Saturday, March 29, 2014

Lemon Poppy Seed and Yogurt Pancakes


I love Saturday morning pancakes...especially for lunch on Friday because you're working from home and are still wearing your PJs. Yesterday Brett and I did just that. We worked from home and didn't get dressed until 5 PM when we had to leaving to go watch Frozen. Rough life right? My office was doing an outdoor showing of Frozen and they give away free hotdogs, pop corn, chips and slushies. It's always fun to watch a clean movie outside on a nice, Florida evening with friends.

But back to food.

I never get sick of breakfast food, but I rarely spend more than a few minutes zapping some oatmeal in the microwave or pouring almond milk over a bowl of cereal. Yesterday though I was craving some lemon poppy seed pancakes and thankfully that sounded good to Brett too. 


Lemon poppy seed is one of my all-time favorite flavor combinations. If I had to choose one kind of muffin to eat for the rest of my life, lemon poppy seed would win. Hands down. And we all know there are some amazing muffins out there. 

It just light and sweet but not too heavy. I whipped these up with half whole wheat flour and half all-purpose flour and I used almond milk and my homemade non-dairy yogurt as the main wet ingredients. Add in some lemon juice, zest and some poppy seeds and then you're good to go!


Look how light and fluffy those lil' guys look!


And you can never go wrong with some earth balance and agave on top. Perfection.


This was a new recipe and I'm happy to say that it is Brett approved. I was pretty pleased with the results myself. It's so fun to make something common like pancakes a little more special, especially on a Friday afternoon.


Lemon Poppy Seed and Yogurt Pancakes
(Serves 3-4)

Ingredients:
  • Scant 1/2 cup almond milk
  • 3 tablespoons fresh lemon juice
  • 1/2 cup non-dairy, plain yogurt
  • 1 flax egg (1 tablespoon ground flaxseed + 3 tablespoons water)
  • 2 tablespoons applesauce
  • 1/2 whole wheat flour
  • 1/2 all-purpose flour
  • 2 tablespoons natural cane sugar
  • 1 teaspoon baking powder
  • 1/2 teaspoon baking soda
  • 1/2 teaspoon salt
  • 1 1/2 teaspoons poppy seeds
  • 1 teaspoon lemon zest (about 1 lemon's worth)
Directions
  1. In a small bowl, stir the lemon juice and milk together and set it aside for a few minutes to curdle.
  2. Prepare your flax egg by whisking 1 tablespoon ground flaxseed and 3 tablespoons of water together. Set aside. 
  3. In a medium sized bowl mix together the dry ingredients: flours, sugar, baking powder, baking soda, salt, poppy seeds and zest.
  4. Add in the yogurt, flax egg and applesauce to your milk and lemon mixture and stir until combined.
  5. Pour the wet ingredients into the dry ingredients and mix until mostly lump free.
  6. Using a skillet and some cooking spray, cook about 1/4 cups of batter at a time, flipping each pancake when the edges begin to bubble and the bottom is golden brown.
  7. Serve warm with earth balance spread and your choice of syrup!


Eat Consciously,

         Faith
Thursday, March 27, 2014

Fiberlicious Pumpkin Bran Muffins


Toasted wheat bran.

Plump raisins.

Pureed pumpkin.

Whole wheat flour.

With ingredients like these, you know you're gonna have some delicious and healthy muffins. 

I've always loved "bran" flavored foods and I'm one of those weird people that prefers plain cereal like All-bran and cheerios over lucky charms and captain crunch. A few weeks ago when Brett and I were in Arkansas for work we went to Cracker Barrel (Oh Cracker Barrel. So many childhood memories!) with my cousin and her boyfriend. Brett got a bran muffin to take with him as a snack for later and ever since then bran muffins have been on my mind. I just haven't been home long enough to make a batch.

Thankfully, Brett and I are home for a whole month so I've been able to cook and bake my heart out! Obviously one of the first things I made were these muffins. I had no idea wheat bran was so dang cheap! Bonus. The rest of the ingredients I already had on hand which made these really easy to whip up.


They're sweetened with pureed raisins, molasses and brown sugar and I used applesauce instead of oil which made them really moist. The pumpkin flavor is subtle, but delicious. 

If you're a fan of nuts, walnuts would be great in these.

I stored them in a zip-lock bag in the fridge and we've been enjoying them for breakfast and as a quick snack all week! If you're a meal planner, you should definitely add these muffins to your weekly menu.


Pumpkin Bran Muffins
(Makes 16 muffins)

Ingredients:
  • 2 cups wheat bran, toasted
  • 1 1/4 cups raisins, divided
  • 3/4 cup water, divided
  • 1 cup pumpkin puree
  • 1/3 cup molasses
  • 1/2 cup dairy-free, plain yogurt
  • Zest of one orange
  • 1/2 cup light brown sugar
  • 1/4 cup unsweetened applesauce
  • 1 tablespoon ground flaxseed + 3 tablespoons water
  • 1/2 cups all-purpose flour
  • 1/4 cup whole wheat flour
  • 1 teaspoon pumpkin pie spice
  • 1 1/4 teaspoon baking powder
  • 1 1/4 teaspoon baking soda
  • 1/2 teaspoon salt

Directions:

  1. Preheat your oven to 400 degrees and grease 2 muffin tins and set them aside.
  2. Spread the wheat bran on a baking sheet and toast in the oven for about 5 minutes. Stir once to help it toast evenly.
  3. While the bran is cooking make your flax egg by whisking the flaxseed and water together in a small bowl. Set aside.
  4. In a small sauce pan, heat 1/2 cup of raisins with 1/4 cup of water. Let the raisins simmer until all of the water is absorbed. 
  5. Puree the raisins in a food processor with the molasses and pumpkin puree until smooth.
  6. In a large bowl mix together the toasted wheat bran, plain yogurt and 1/2 cup water. 
  7. Add in the raisin/pumpkin puree, orange zest and brown sugar and mix. 
  8. Stir in the applesauce and flax egg.
  9. In a separate bowl whisk the flours, pumpkin pie spice, baking powder, baking soda and salt. Then pour these dry ingredients into the wet ingredients and stir until just combined.
  10. Fold in the remaining 3/4 cup raisins.
  11. Spoon the batter into the greased muffin tins and bake for 22-25 minutes or until the centers have set. 
  12. Let cool in the pans for a few minutes before removing to a plate or wired rack to cool. 
  13. Store in a zip-lock bag in the fridge or freeze.

Notes: "Veganized" from According to Elle.

1/16th of this recipe gives you almost 6 grams of fiber and 3 grams of protein. Not bad for 130 calories of goodness!


Eat Consciously,


Faith

Monday, March 24, 2014

Homemade Whole Wheat Rosemary Wheat Thins! They taste like the real deal.


Well, I'm proud to stay that I'm still on my "make-everything-I-can-at-home" streak and going strong. For those of you just now reading, about a week ago I decided that I wanted to try to make our basic staple foods at home (when I have the time, that is). I never would have even thought that you could make almond milk, yogurt, wheat bread, crackers or cheese at home about a year ago. But since going vegan almost a year ago a whole new world of cooking and baking has opened up to me and I've had to be more creative. 

Also, as Brett and I plan to move overseas in a couple years, I don't know what types of food we'll have access to so I figured now is the best time to get down the basics.

So far I've botched the following:

Whole Wheat Tortillas
Bear Bread

With that said, I've also successfully made the following:

Non-dairy Yogurt (Can you even believe it!! I'll share more soon.)
Wheat Thins


Oh. My. Goodness. Let's talk about these homemade wheat thins. I absolutely loved how these little squares of goodness turned out and they were surprisingly easy to make. The dough wasn't sticky and I was able to roll it out really thin for an amazingly delicious cracker that tasted like the real deal. I'm excited for my first batch to run out so that I can experiment with some different spices in the next batch. I'm thinking about even adding in some nutritional yeast to make a cheesy flavored cracker. 

Savory. Sweet. The possibilities are endless!

This is not my recipe by any means, but I really hope you try them out. There are only 7 ingredients, one of which is water. Get creative and share with me any new combinations you discover.


Homemade Wheat Thins
(Makes 100 crackers)

Ingredients:

  • 1 1/4 cup whole wheat flour
  • 1 1/2 tablespoons sugar
  • 1/2 teaspoon salt
  • 3/4 teaspoon dried rosemary, minced
  • 4 tablespoons non-dairy butter (I used earth balance)
  • 1/4 cup water
  • Sea salt for topping

Directions:


  1. In a large bowl, whisk together the flour, sugar, salt and rosemary.
  2. Using a pastry cutter or two knives, cut in the butter until there are now pieces larger than a pea.
  3. Pour in the water and stir until combined. It might seem dry at first, but use your hands to keep incorporating the ingredients until you get a ball of dough.
  4. Preheat your oven to 350 degrees.
  5. On a piece of parchment paper that has been lightly floured, roll out 1/4 of the dough at a time into a rectangle. Roll it as thin as possible! And then roll it even thinner!
  6. Use a long, sharp knife to cut the dough into squares or triangles. Make the crackers whatever size and shape you want. If you like perfect crackers, you will probably need to trim up the edges of your dough. Otherwise keep things rustic!
  7. Do step 6 with another 1/4 of the dough so that you have two sets of crackers ready to bake. Pull the parchment paper onto baking sheets. 
  8. Sprinkle the crackers with sea salt and slightly press the salt into the dough.
  9. Bake the crackers for 5-10 minutes until slightly browned. It's a long range of time because it all depends on how thin you roll your crackers. Mine usually take about 8 minutes. Be careful though because they can go from perfect to burnt in a short time.
  10. Repeat steps 6-9 for the rest of the dough. 
  11. Brake any crackers apart that are stuck together and let them cool on a separate plate. 
  12. Store them in an air tight container. 
  13. Enjoy!
Notes: Adapted from Kitchen Stewardship 


Eat Consciously,

Faith

Saturday, March 22, 2014

Almond Pulp Freezer Fudge


I love Saturdays. Period.

Brett and I left the house this morning at 8:30 for a morning of fun errands. First, he went to a boxing class while I hit up Whole Foods. I got rolled oats, nutritional yeast and wheat bran from the bulk section and two cartons of almond milk (to try and make homemade yogurt with...I'll keep you posted) and only spent 8 bucks! That's a win.

After Brett got out of class we sold some of our books at a book store. We only made $25 for a lot of books, but it felt good to get them out of the house and to make some money. We are slowly trying to get ride of things we don't need and sell some of our bulky furniture in preparation for moving to NYC. Slowly being the key word. We're getting there though!

Next was the Farmer's Market in Winter Park...or at least so we thought. Traffic was crazy the closer we got to the market. Luckily we found parking not to far away. Once we made it to Park Ave, the main street in Winter Park, we realize why there was so much traffic. There was an art show! Hundreds of people were there perusing the art, eating popcorn and hot dogs and just enjoying the beautiful, Florida weather. The Farmer's Market wasn't happening, but all the art we got to see made up for it. I'm amazed by people's artistic abilities. Incredible. 

We walked around for a while until Brett wanted some food. He got a Burger at BurgerFi, a new-ish restaurant in Winter Park and then we headed home. 


I guess I'll stop boring you with Brett and my Saturday shenanigans and get to the good stuff. Fudge! The last recipe I posted was for Homemade Almond Milk and I mentioned that there are different ways you can use the almond pulp that is left over after you make your milk. No reason to waste all that nutritious goodness!

This fudge is easy and healthy and I just keep it in the freezer for a quick sweet tooth fix. Enjoy!


Almond Pulp Freezer Fudge
(Makes 30 squares)


 Ingredients:

· 1/2 cup old-fashioned oatmeal
· 1/2 cup raw almond pulp
· 3 tablespoons cocoa powder
· 2 tablespoons agave nectar
· 1/4 cup almond milk
· 2 tablespoons coconut oil
· 2 tablespoons applesauce
· 1/2 teaspoon sea salt
  
Directions:

1. Line an 8 x 8 baking dish with wax paper and set aside.
2. Using a food processor, start by processing the 1/2 cup of rolled oats into oat flour.
3. Add in remaining ingredients and puree until smooth. You may need to stop and push down the sides with a spatula occasionally.
4. Once smooth, pour into your prepared baking dish.
5. Freeze for 2-3 hours. Then remove the fudge from the dish and cut into pieces. I cut mine into 30 pieces, but you can make them whatever side you want.
6. Store in the freezer and enjoy!

Notes: Adapted from here.


Eat Consciously,
     Faith


Wednesday, March 19, 2014

Mind Blown...Homemade Almond Milk!


Seriously. I don't know why I haven't done this sooner! In my last post I talked about how I wanted to start making everything at home from scratch that I can. I know there will be times when I'm to busy to make fresh bread or tortillas, but I really want to get some basic foods down pat before I move overseas. That way I can make things like almond milk and whole wheat bread wherever! 

Homemade almond milk has been on my list of things to try for a long time. I just seemed intimidating. Man was I wrong. This took no time at all to make and I know exactly what's in it! You can make simple almond milk with just two ingredients, or you can easily add in some vanilla and sweeteners for vanilla almond milk. And another great thing about making homemade almond milk is that you can use the leftover pulp to make Almond Pulp Freezer Fudge or Almond Pulp Cracker. I'll share these recipes soon!

Almond Pulp Freezer Fudge
Recipe coming soon!


I'll start by showing you how to make basic almond milk, but I'll share how you can add in additional ingredients to make sweetened vanilla milk. If you're going to use your milk for baking or in tea, I would suggest leaving it plain. If you want it for drinking or in cereal try sweetening it up!


Basic Almond Milk
(Makes 4 cups)


 Ingredients:

· 1 cup almonds, whole
· 3-4 cups water (see notes below)

· Optional Add-ins: 1 tablespoon vanilla extract, 2-4 pitted dates, 2 tablespoons honey or agave nectar

Directions:

1. Soak. Soak the almonds in cold, clean water for at least 8 hours or up to 48 hours.  They’ll expand and become soft.
2. Drain and Rinse. After the almonds have soaked,  drain and rinse them.
3. Blend. Place the rinsed almonds and 4 cups of water in a blender. Blend on high for about 2 minutes until the liquid is white and you only see small bits of almonds. (If you're making sweetened vanilla almond milk, add in 1 tablespoon of vanilla extract and 2-4 pitted dates to the almonds and water before blending.)
4. Strain. Pour the milk into a nut milk bag, paint strainer bag or over cheese cloth that has been positioned over a bowl. Allow the milk to drain out as much as possible into the bowl
5. Squeeze. Once most of the almond milk has strained out of the bag on its own, use your hands to squeeze the bag or cheese cloth so that you extract out as much milk as possible. Soon you’ll be left with a dense lump of almond pulp in your bag. (Don't throw the pulp away, but use it in other recipes!)
6. Refrigerate. Refrigerate the milk in a pitcher or container for 3-5 days. You will need to shake it before drinking as the mixture may separate while sitting.
7. Enjoy! Enjoy your homemade almond milk in cereal, tea or with a warm cookie!

Notes: If you like your milk thicker, use only 3-3.5 cups of water.

Below are step by step instructions with pictures!


Soak 1 cup of almonds uncovered in cold water for 8 hours or even as long as 
48 hours until they are big and plump.

After soaking your almonds, place them in a blender with 4 cups of water and any additional add-ins you may want. Blend on high for 2 minutes.

You can stop blending once you have white milk and only small almond particles left.
 
Using cheese cloth, a nut milk bag or a paint strainer bag, strain your milk by pouring it into the bag over a large empty bowl.

I would have used a paint strainer bag if I had gone to the store in time, but cheese cloth inside a strainer works great too!


Let the almond milk strain through the bag or cloth for a while.
  
Then use your hands to squeeze the remaining milk out of the almond pulp. Soon you'll just have almond pulp and...

...beautiful, homemade almond milk!

Store your milk in the refrigerator for 3-5 days.
Ignore the mess in my kitchen:)


Eat Consciously,
     Faith


Tuesday, March 18, 2014

Whole Wheat Sandwich Bread (Vegan and No-Knead!)

It's official.

I've decided I'm going to make everything at home that I can.


Bread. Tortillas. Beans. Peanut butter. Almond milk. Non-dairy cheese and yogurt even.

I always hate when I go to buy some bread or tortillas and have a hard time finding a loaf that doesn't have 20+ ingredients. Or that I have to be careful to thoroughly rinse my beans to rid them of their metal taste and excess salt. Or that, unless I live by Trader Joe's, it's hard to find natural peanut butter that only contains peanuts and doesn't cost a fortune. You'd think less ingredients would equal less expensive.

I've always wanted to do this, but always thought it would be really time consuming. Lately, however, I've been realizing that once Brett and I move overseas we won't necessarily have access to certain things like non-dairy milk, whole wheat bread or non-exported peanut butter.

I might as well start learning and practicing now!

The crazy thing is that since Brett and I got home from Texas on Sunday night I've already made a loaf of whole wheat bread, 6 whole wheat tortillas for wraps, a big pot 'o black beans and vegan cheese. And it was easy!

Sure the bread required a few hours of rising time and the black beans had to soak over night, but I was able to go on with normal life during those waiting periods.

And the best thing is: I know exactly what was put in my loaf of bread. Five ingredients.

And the tortillas? Four ingredients.

Love it.

I know you're probably thinking, "Faith, homemade bread and tortillas are easy to make. Everyone does that!"

I know. But it's a big step for me and soon I'll have some staple, go-to recipes for all of these basics. It's the vegan cheese and yogurt that will be the challenging foods, but I'm ready to learn!

Okay, now onto the bread. This recipe I found at the Vegan Baker. It only requires five ingredients, one of which is water, and you don't have to knead it. The total time it takes to make is about five hours, but much of that time is spent letting the dough rest in a warm place to rise. Seriously, this bread is so easy and Brett and I love it!

Ingredients: 
2 cups warm water
2 tablespoons agave nectar
1 1/2 teaspoons active dry yeast
3 1/2 cups whole wheat flour
1 1/4 teaspoons salt


To make this bread you start by whisking together the warm water, agave and yeast. Then you let it sit for 10 minutes until the yeast starts to activate and the mixture becomes foamy.


In a separate bowl you whisk together the whole wheat flour and the salt. Then you pour in the wet ingredients and mix vigorously for one minute with a wooden spoon until a sticky dough forms.
Place a plastic bag over the bowl (or pot!) and let it sit in a warm place for about 
1.5 hours until it doubles in size.

After 1.5 hours, use your wooden spoon to mix it again for about 30 seconds. Recover the bowl and let it rise again for another 1.5 hours or until double in size. 


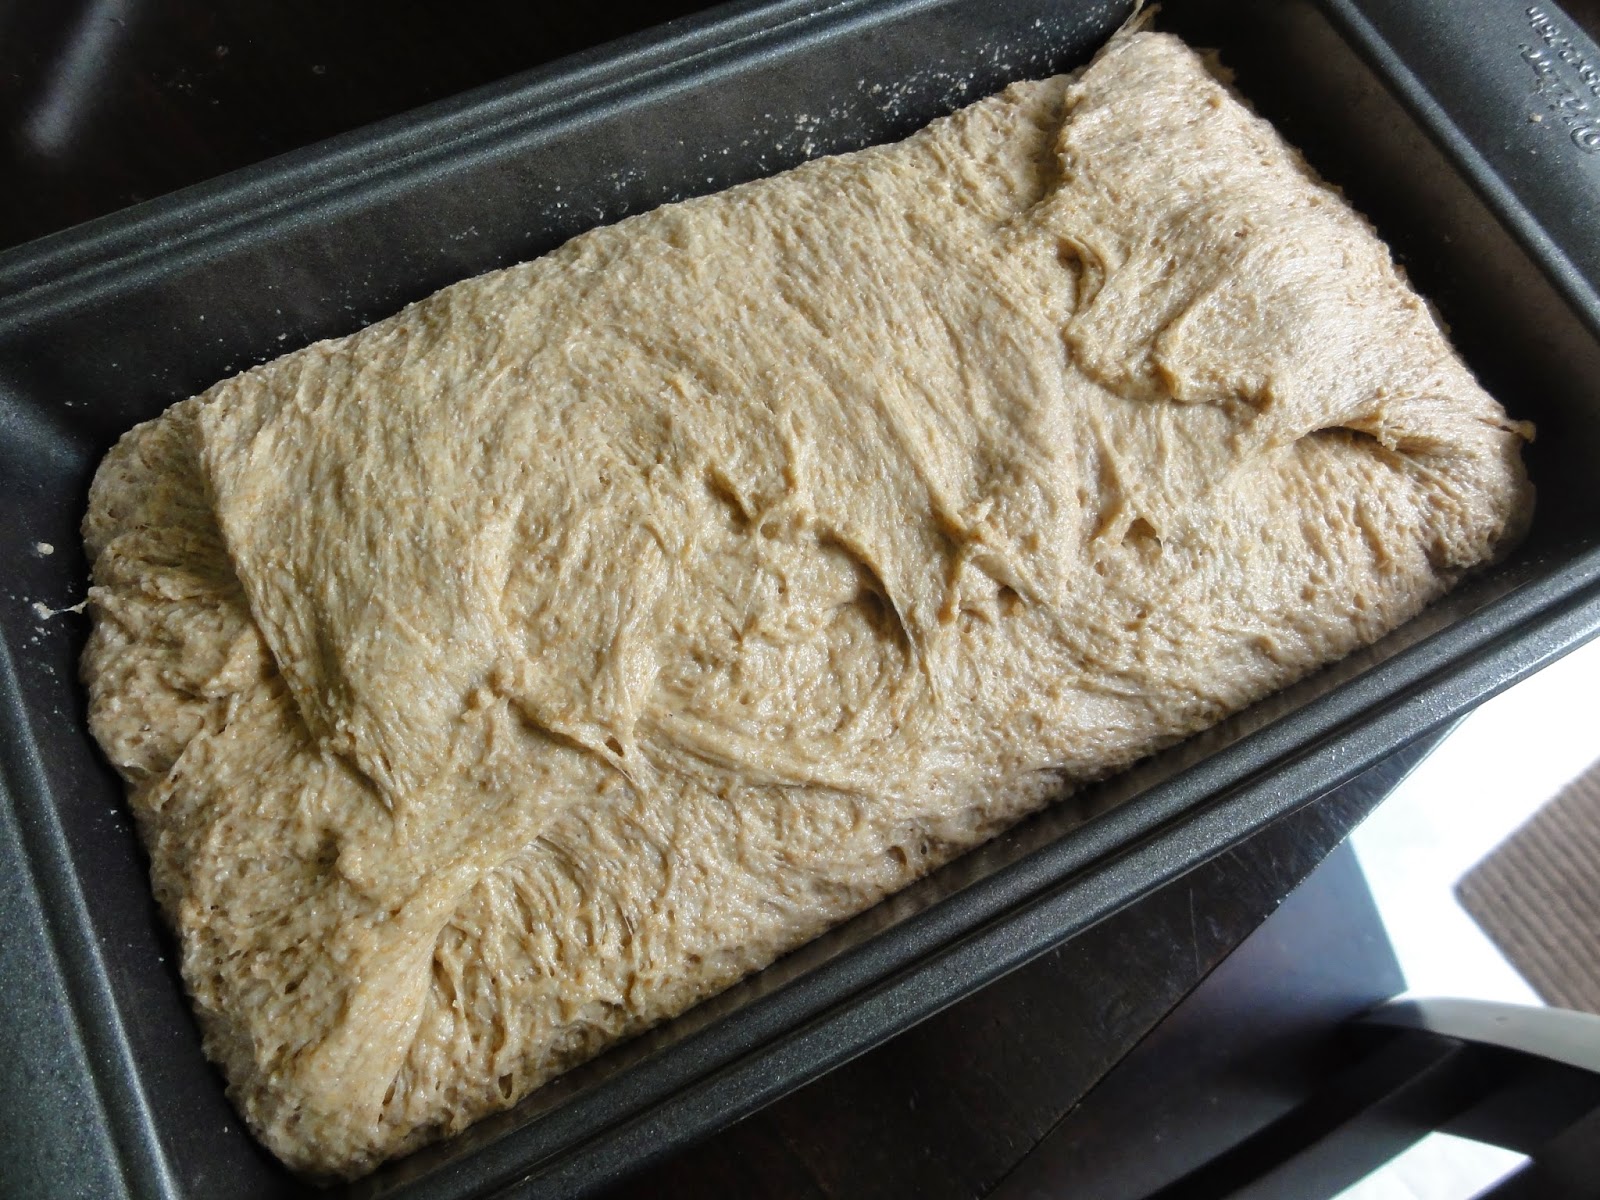
For one last time, mix the dough for about 30 seconds to de-gas it. Then place the dough in a loaf pan that has been sprayed with cooking spray. Spread the dough out so that it fills the whole pan.


Let the dough rise again for about 40 minutes until it is about 80-90% of the size it will be when baked.


If the dough gets a little out of control, use your hands to stretch the dough from the perimeters across to the other side of the pan. Do this all the way around.


Then bake the bread at 350 degrees for 40-45 minutes, rotating the pan 180 degrees half way through.


Let the loaf cool in the pan for about 30 minutes before transferring it to a wire rack to finish cooling.

 
Slice and enjoy!


If you know you're going to go through the entire loaf in about a week, it should keep stored in a air tight bag in a cool place. Otherwise slice the entire loaf and store it in the freezer!


Monday, March 17, 2014

Good Eatin' in Dallas!

The past ten days were a whirlwind! Brett and I left for Houston, Texas last Friday and got back home last night from North Carolina. We started in Houston for the first weekend and got to spend two days with Brett's family. We celebrated birthdays, anniversaries (ours is in 13 days!) and new jobs. We even fit in some strawberry picking at a nearby patch. It was so great to be with family.

Brett and his sister at the strawberry patch.

Sunday evening Brett and I made the short flight to Dallas for the week. We had some recruiting work to do there and also met with a bunch of Brett's friends from when he lived in Dallas for 6 years. Our schedule each day was seriously jam packed. Some days would start breakfast with friends at 7 A.M., coffee with someone else at 9 and then we'd recruit from 10-11. After that we'd rush to meet up with more friends for lunch and then often we'd try to fit in a quick gym session at LA Fitness before meeting up with more people for coffee and dinner. We were so wiped out by Friday!

Even though it was tiring to meet with so many people in between working, we loved it. And of course we got to eat some delicious food. Usually I don't like eating out that much, but this trip wasn't as bad as other trips we've been on. Most of the time we'd eat breakfast at our hotel and there were a few days that I would just get a big ol' salad from Whole Foods. 

But, I have to highlight some restaurants in Dallas. I think the best meal I ate all week was at Asian Mint. They have sushi, thai food and desserts. 
  

I got the green curry and I couldn't stop saying, "Mmmm!" This picture doesn't do it justice. It was so creamy and flavorful. You have to eat here if you ever make it to Dallas!


Another delicious meal we had was from The Juice Bar. Expensive as all get out, but delicious.


Brett and I had just finished up our workouts at the gym and had a little free time before we needed to be at the airport. We got these Acai Cups with vegan protein powder mixed in. They topped it with chopped up banana, blueberries and amazing granola. Delicious!


Eatzi's is another great spot. You can make your own sandwiches or salads, pick up some already made sushi, or choose from a wide variety of entrees and sides already made. I got some sushi while Brett got the pasta of the day, kale and white bean salad and roasted cauliflower. I love this place because everyone can get something different and there are tons of vegan and vegetarian options!


While the green curry was my favorite meal all week, this restaurant was my favorite. The Cosmic Cafe serves vegetarian Indian food and it's incredible. The restaurant itself is so eclectic and colorful. It's hard to miss!


I got the Buddhas Delight so that I could try a few different things. Everything was incredible and I left stuffed but content. It was spicy, but not over kill, and everything was bursting with flavor. They even offer non-dairy desserts a lot of the time. 


And of course a lot of Americanos with steamed soy were enjoyed throughout the week! This cup is from a newer place called the Ascencion Coffee House. It was a cool venue and had nice outdoor seating too.


Our trip ended with a bang in North Carolina. Friday afternoon we flew from Dallas to North Carolina for a friends wedding. Most of my family was there so during this trip we got to see both of our families! Amazing! The wedding was a blast. They did breakfast for dinner (why didn't I think of that) and for dessert everyone was able to go to the frozen yogurt shop downstairs. They had glow in the dark sticks for entertainment too. Brett tried to make Mickey Mouse ears and we even ended up making a hula hoop. It didn't work very well, but we tried.


Now were home for a whole month! I'm excited to get some rest and to cook and bake up a storm. I already have a pot of black beans cooking and some fresh whole wheat bread on the counter. Life is good!

Eat Consciously,

     Faith