Monday, February 24, 2014

Juicy Chia Pudding (Two Ingredients!) and the Coziest Cabin Ever!

I think this past weekend was one of my favorite weekends that Brett and I have spent together since getting married. And with all the traveling we've done, that's saying a lot. (You can scroll to the bottom for this random chia pudding recipe or keep reading about our weekend.)


Even though I just got back from Africa on Sunday, Brett and I had to leave for Arkansas five days later for work. Brett being the thoughtful husband that he is knew that a restful weekend would be just what the doctor ordered after lots of travel and a month a part. So as a surprise Brett rented out a cute little cabin for us to relax in this weekend before we had to start work. It was the cutest, coziest cabin ever and it was the perfect way to spend some quality time together after being a part for a month.

Here are some pics of the cabin. There was a hot tub and fire pit outside and an electric fire place inside. They even had the fire all set up and all you had to do was light a match! S'mores were eaten for sure.


I loved everything about this little cabin!


Brett and I went on a hike together on Saturday and Monday and Brett did a 10-miler by himself on Sunday! My hip has randomly started hurting so I didn't join him on the 10-miler, but he had a blast challenging himself to get up and back before dark.

Here are some pictures of the views we saw from our hikes and also from the drive to our cabin. Even though everything was mostly dead from the cold weather, the sites were still stunning.


At the end of this hike there was a cave that we were able to explore. At the very back of the cave there was a large "room" with a waterfall inside.


The cabin we stayed in had a full kitchen too so we bought some groceries in town before heading out into the boonies for the weekend. At one point I wasn't "feeling" any of the food we had so I got creative and made some chia pudding with chia seeds I brought from home and juice. I'm not usually a big juice fan, but this hit the spot!


The key is 3 tablespoons of chia seeds to 1 cup of liquid. 

Combine the seeds and liquid and stir well. Stir again after a minute...and then again after another minute. Then wait about five minutes and stir again before letting the pudding sit in the fridge for a few hours or overnight. The pudding will thicken and then you can jazz it up with any toppings you want. We had bought some bananas and granola and it made for a good combo.

After a month in Africa with less than ideal nutrition and a bad stomach bug that lasted about a week, I've been adding chia seeds to everything to get my digestive tract back in working order.


You can obviously use any kind of liquid for your chia pudding. I usually use almond milk, so juice was a good change up.

What are some of your favorite ways to use chia seeds?


Friday, February 21, 2014

Homemade Wheat Hamburger Buns


I'm back from Africa after what feels like forever! Overall it was a good trip, but I got really sick on the return journey home. I've basically been laying on the couch this week, except for the one day I went into work for a meeting.

For the first few days that I was home, food and I were in a rocky relationship. Right before I left Africa, all I could think about was all the fresh fruits and veggies I'd get to eat when I got back to America, but after getting sick, those were the last things I wanted to eat. The only things that sounded somewhat appealing were almond milk, cereal, chocolate, caramel popcorn, pizza and ketchup. Let's just say my diet has been less than ideal.

Today was a fresh day though and I woke up feeling great. I got to go on a run for the first time in a month and I even had a big ol' salad for lunch. Things are looking normal again.

Even though I just got back from being gone for a month, Brett and I are yet again leaving for another trip this afternoon. Since we were only going to be in town a few days, and since I wasn't feeling 100%, I only cooked one meal this week: black bean burgers and homemade hamburger buns.

Right before I left for Africa I really wanted to make homemade bread but never got around to it, so I took advantage of the one afternoon I was feeling decent and tried out these buns. They turned out wonderfully dense and delicious. It was a nice treat to eat some homemade bread with our burgers and corn on the cob. The buns weren't hard to make either, but just required some time to rise. Give 'um a try!

Wheat Hamburger Buns
(Makes 6-8 buns)


 Ingredients:

· 1 1/2 cups whole wheat flour
· 1 1/2 cups all-purpose flour
· 1/2 teaspoon baking soda
· 1/2 teaspoon salt
· 1 1/2 cups warm water, divided
· 1 1/2 teaspoons active dry yeast
· 2 teaspoons sugar
· 3 tablespoons vegetable oil
  
Directions:

1. In a small bowl mix together the sugar, yeast  and 1/2 cup of warm water,  Set aside for ten minutes until the mixture become frothy.
2. In a larger bowl whisk together the flours, baking soda and salt.
3. Once the yeast mixture is frothy pour it into the flour mixture along with the vegetable oil and the rest of the warm water. (You may not have to use all of the warm water so add it in a little at a time.) Mix until combined and a sticky dough forms.
4. Knead the dough for about five minutes.
5. Place the dough in a greased bowl. Cover the bowl with a kitchen towel and place it in a warm place to rise until double its size, which should take about two hours.
6. Punch down the dough and divide it into six sections. Shape the sections into balls and place them on a lightly greased baking sheet dusted with flour.
7. Let the balls rise some more until almost double in size.
8. Bake the buns at 350 degrees for about 25 minutes.
9. Let cool. Enjoy!

Notes: These came out pretty dense so Brett and I cut them into fourths and got two "buns" out of one. Next time I might make 8 buns and flatten then out a little before baking. They're delicious either way!
Recipe from KurryLeaves.

The dough before rising.


The dough after rising.


Eat Consciously,
     Faith


Monday, February 10, 2014

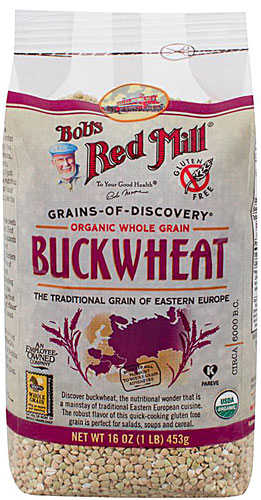
How to Use Buckwheat Groats (A Breakfast Recipe)

Ever heard of these? I hadn't until a few months ago. As you may know I'm an oatmeal lover and love having a big bowl of oats every morning. Really anything "grain-like" is my ideal breakfast so when I heard of buckwheat groats I figured I should see what they were all about.

I was happy to find that Buckwheat Groats are full of fiber and protein and low in fat and sugar. 1 serving of these bad boys (1/4 cup) has 5 grams of fiber and 6 grams of protein. Hello nutrients! You can use Buckwheat Groats to replace rice or other grain dishes or you can even grind it into flour. Me, being the breakfast lover that I am, decided to try them out in overnight oatmeal.


An easy way to use Buckwheat Groats is by soaking them overnight in water so that they soften up, but are still a little crunchy. All you do is place 1/4 cup of Buckwheat Groats in a bowl, cover them with water and place the bowl in your fridge overnight or for 8 hours. 

In the morning, pour the groats into a strainer and rinse them well. This gets rid of the sliminess that forms overnight. I know that isn't the most appealing description for a breakfast food, but once you rinse them you'll be good to go...no more sliminess.


Once you've rinsed them you can add them to cereal, cooked oatmeal or on top of a smoothie. For this post I used Angela's Buckwheat Parfait recipe from Oh She Glows for inspiration. I made a chocolate version by adding 1 tablespoon of cocoa powder to my chia seed mixture. You can use any overnight oatmeal recipe. Then in the morning just stir in your soaked and rinsed Buckwheat Groats and you're good to go. 

Eat your oatmeal/groat mixture as is or spruce it up by making a parfait with fruit or top it off with some granola or nuts. The ski's the limit!


Eat Consciously,
     Faith

Monday, February 3, 2014

Breaded Baked Tofu


For a while I've been wanting to experiment more with tofu. Since I stopped eating meat I've mainly been getting my protein through veggies, grains and nuts, but occasionally I like to eat tofu or tempeh for some extra ummmph. Usually I'll just press my tofu for a half-hour or so with some heavy books to get rid of excess water and then cut it up into cubes and saute it in a pan. I've had never tried marinating it or breading it before until recently and made quite a difference! 

I decided to try breading some tofu first and it was just like breading any other kind of meat or fish. For a whole block of tofu (pressed for a half hour with heavy books), I used a food processor to processes two pieces of bread that I had into bread crumbs. Then I added in 1/2 teaspoon paprika and 1/4 teaspoon garlic powder and processed everything a little more.


After my tofu had been pressed for a while, I cut it up into 3/4 inch cubes and poured about 2 teaspoons of sesame oil over top. I was making an curry so I thought the sesame oil would be a good addition, but if you're going a different route you can definitely use olive oil or vegetable oil.


After I coated the tofu cubes with some oil I rolled them around in my seasoned breadcrumb mixture until they were coated in the crumbs. I learned that the smaller the bread crumbs the better. My bread crumbs were a little too large so I had a hard time getting the crumbs to stick to my tofu. If you use store bought bread crumbs or process your bread longer you should be fine!


Once all the tofu was breaded I just placed them on a baking sheet sprayed with cooking spray and baked them in the oven at 350 for 35-40 minutes. After the first 20 minutes of baking, rotate the tofu blocks so that they can brown evenly.


After they've baked for about 40 minutes you're all done! You now have some flavorful, protein-packed tofu to add to any dish you're making.


If you have any other recipes for breading or marinating tofu, please let me know! I'm always open to suggestions.

Eat Consciously,
     Faith