Showing posts with label agave nectar. Show all posts

Tuesday, June 3, 2014

One Bowl Vegan Chocolate Cake


I have a baking ego.

I don't know where it came from. For some odd reason though I think I can drastically change a recipe (a.k.a. substitute half of the ingredients in the recipe for different ingredients that I deem "healthier") and still achieve the same result.

It never works.

Thankfully, I still learn a lot in the process and have even had accidents turn into masterpieces. Like this Vegan Chocolate Cake. It was my friends birthday a week ago and we invited her and her husband over for some birthday dessert. I asked her what her favorite flavors and/or desserts were and she mentioned brownies and ice cream.

While her and her husband aren't vegan, they have been in the past and often eat vegetarian meals. Any time we have them over I take advantage of trying out new vegan dishes, because I know that they don't mind meatless meals. More importantly, whenever we have anyone over for dinner I always like to make a vegan dessert. That way I don't sit there awkwardly watching everyone else eat their dessert while they wonder if I have a thing against chocolate. That will never happen. 


So for my friends birthday dessert I wanted to make vegan brownies. I also wanted the ingredients to be ones that I felt good about putting in my body. There are tons of vegan brownie recipes out there that call for two cups of sugar and a cup of oil and I'd rather just not go there. So after a bit of searching I found a recipe that used whole wheat flour, avocado and a little bit of olive oil. I didn't have an avocado on hand so I used unsweetened applesauce instead. I also wanted these brownies to be made only with agave nectar instead of white and brown sugar, so I cut out the white and brown sugar and replace some of the wet ingredients with agave. The batter tasted great and it wasn't as runny as some other brownie batters I've made in the past, so I was feeling optimistic. 

When I checked on the "brownies" close to when they were supposed to be done I realized that they had risen a lot and that it was looking and feeling more like a cake. Whoops. I figured I would just roll with it, whip up some type of frosting or glaze to pour on top and call it a night. I remembered that my mom used to always make this ah-maaaaazing chocolate sauce using milk, chocolate chips and vanilla so I thought I'd make it using vegan ingredients and pour it on top of the cake.


Oh. My. Goodness. The result was one decadent, rich chocolate cake. I didn't want my piece to end! Everyone thought it was a hit and my friend didn't care in the slightest that it wasn't brownies. 

Failure turned success. Finally.


Vegan Chocolate Cake with Fudge Icing
(Serves 8)

Ingredients:
  • 1/4 cup applesauce
  • 1/4 cup olive oil
  • 3/4 cup maple syrup or agave nectar
  • 1/4 cup water
  • 2 teaspoons apple cider vinegar
  • 1 teaspoon vanilla
  • 1 cup whole wheat flour
  • 1/2 cup unsweetened cocoa powder
  • 1 teaspoon baking soda
  • 1 1/2 teaspoon cornstarch
  • 1/2 teaspoon sea salt
  • 1 cup vegan chocolate chips
  • 1 batch Vegan Fudge Sauce or icing of choice
Directions:
  1. Preheat your oven to 350 degrees and spray a loaf pan with cooking spray.
  2. In a large bowl whisk together the applesauce and olive oil until smooth. 
  3. Add in the remaining wet ingredients (until vanilla) and mix until combined.
  4. Add in the flour, cocoa powder, soda, starch and salt and stir until you get a thick batter.
  5. Fold in the chocolate chips.
  6. Pour the batter into your prepared pan and bake for about 30 minutes until a toothpick inserted into the center comes out clean. My edges cooked quicker so make sure you check the center of the cake!
  7. Let the cake cool, remove from the pan and top with Easy Vegan Fudge Sauce.
  8. Cut and dig in!


Eat Consciously,

Faith

Tuesday, May 6, 2014

5 Ingredient No-Bake Peanut Butter Oatmeal Bars!


We've all had them. Those chocolaty, chewy oatmeal cookies made with tons of butter and sugar. While they can sometimes look like little cow pies, Chocolate No-Bakes Cookies are delicious. 

One of my first memories of Chocolate No-Bake Cookies was the summer after my freshman year of college. I was out in Colorado being a camp counselor at an outdoor adventure camp. I was living at 9,000 feet, hiking, making forts out of tree trunks, swimming in freezing water and running after energetic kids from the inner-city. It was an amazing fun job...if you're into that kind of thing. And I was!

My mom, being the thoughtful person that she is, probably knew that I was expending tons of energy everyday living at such a high altitude and constantly being active. So throughout the summer she sent me care packages of delicious home-made goodies. 


The first package she sent me had no-bake cookies in it. Wow oh wow. I had never had them before and I couldn't get enough. Let's just say they didn't last long, especially once my friends found out about them.

While your typical, no-bake cookies are stinkin' delicious, I'm not a huge fan of the amount of processed sugar and butter that can be packed into them. The other day I figured I'd try out my own recipe. I'm on a peanut butter kick so I thought I'd keep that the main flavor. I knew I'd have to sweeten them some, but I didn't want to use white sugar. I also knew that there had to be an ingredient that would hold everything together. 

I only experimented once and was happy with the result! There are only five ingredients and these bars are dairy-free and sweetened with agave instead of white sugar. I also used coconut oil to hold everything together. They're chalk-full of energy and are delicious! Soon I'll be experimenting with no-bake bars that are only sweetened with bananas. I'll keep you posted:)


Peanut Butter No-Bake Oatmeal Bars
(Serves 16)

Ingredients:
  • 3 cups old-fashioned rolled oats
  • 1/2 cup peanut butter
  • 1/2 cup agave nectar
  • 1/4 cup coconut oil
  • 1/4 cup almond milk
Directions:
  1. Spray an 8x8 baking dish with cooking spray and set aside.
  2. In a medium sized sauce pan combine the peanut butter, agave, coconut oil and almond milk. Slowly increase the heat while mixing constantly until the mixture starts to boil. 
  3. Let the sauce boil for one minute while you continue to stir.
  4. Remove the sauce pan from the heat and stir in the rolled oats 1 cup at a time until all the oats are fully covered in the peanut sauce.
  5. Pour the mixture into your prepared baking dish and use a spatula to even everything out. Use your hand or the spatula to firmly press the mixture into the pan so that when everything cools, the oats will stick together.
  6. Place the baking dish in the refrigerator for about 30 to 1 hour until it has cooled. 
  7. Cut into 16 squares and enjoy!


Eat Consciously,

Faith

Friday, April 18, 2014

Curry Roasted Cauliflower and Chickpea Salad with Sweet Tahini Dressing.


I crave this salad like it's dessert and I can't help but go back for seconds. Every. Time.

Usually salad aren't my first choice for a meal, but lately I've been experimenting more with toppings and dressings and they've started to grow on me. A while back I discovered this amazing Sweet Tahini Dressing from Happy. Healthy. Life and I've been drizzling it on everything. It's my favorite on roasted cauliflower and carrots!

Not long after I discovered the Sweet Tahini Dressing I came across a recipe for curry roasted cauliflower and knew that I would wanted to try both of them together. So I got to it. I added in chickpeas for some protein and crunch and the combination was just as I hoped: INCREDIBLE!


Curry Roasted Cauliflower and Chickpeas
(Serves 4)

Ingredients:
  • 1 head cauliflower cut into florets
  • 2 cups (or 1 can) chickpeas, rinsed
  • 1 1/2 tablespoons olive oil
  • 1 tablespoon curry powder
  • Salt and Pepper to taste
Directions:
  • Preheat the oven to 425 degrees.
  • Prepare a baking tray with aluminum foil and set aside.
  • Place the cauliflower florets and chickpeas in a large bowl and drizzle with the olive oil.
  • Shake the curry powder, salt and pepper overtop of the veggies and toss everything together so that the cauliflower and chickpeas get fully coated with the spices.  
  • Pour the veggies on your prepared baking tray and roast in the oven for about 20 minutes until fork tender.


For Kathy's Sweet Tahini Dressing you'll need:

  • 2 tablespoons tahini
  • 2 tablespoons apple cider vinegar
  • 1 1/2 - 2 tablespoons agave nectar
  • 1/2 teaspoon garlic powder
  • Juice of one small lemon
  • Salt and pepper to taste
Place all the dressing ingredients into a bowl and whisk until smooth.


Curry Roasted Cauliflower and Chickpea Salad 
with Sweet Tahini Dressing
(Serves 4)

Ingredients:
  • 4 servings of spinach
  • 1 recipe for Curry Roasted Cauliflower and Chickpeas (see above)
  • 1 recipe for Sweet Tahini Dressing (see above)
Directions:
  1. Evenly divide the spinach among four bowls and top with the curry roasted veggies and dressing.
  2. That's all there is to it! Enjoy!


Sunday, April 13, 2014

8 Ingredient Coconut Cranberry Scones! {Gluten-Free, Dairy-Free, Egg-Free, Nut-Free}


Does anyone else really miss cooking when you're traveling? Or is it just me? Yet again, Brett and I were gone this past week for a five-day work training and the whole week I kept thinking about cooking and baking. I always seemed to have a recipe swimming around in my head or a new flavor combination I wanted to try. It was killer!

The training was actually held where Brett works, which is only 25 minutes away from our house, but we still opted to stay on campus for the week. There were a lot of sessions after dinner and the days started early, so we figured it would be nice to not have to drive back and forth each day.  

Brett's office is right by a lake and it's actually where a KOA campground is located. We were blessed to be able to stay in "Deluxe Cabin #1" for the week which was right on the lake. We had a porch with a swing where we could enjoy the sunrise in the mornings and the cool breeze at night. One morning we even took two kayaks out to watch the sun rise on the water. The cabin itself was great too. The "master" bed was pretty small, so Brett ended up sleeping on the futon in the main room while I had the bed to myself. We like our space when we sleep.


Even though I wasn't able to experiment in the kitchen all week, I was blessed with some amazing vegan goodies. The hospitality team that cooked all of our meal for us was so sweet. One girl on the team is around my age and is vegan too, so she baked me special, vegan desserts! She made some amazing almond butter snicker doodle cookies, no-bake cookies and brownies. I definitely ate more sugar than I have in a while! Everything was delicious, which just added to my desire to experiment in the kitchen even more. 

The training finished up on Friday afternoon and I'll admit that by Friday evening I had already whipped up these Coconut Cranberry Scones as well as some Curry Roasted Cauliflower and Chickpeas for one of my new favorite salads. I had been thinking about making scones using coconut oil and coconut milk all week and I'm so happy with how these turned out. They're moist and flaky, easy to make and only require 8 ingredients. They're even refined sugar free!

Here's a list of some of the goodness that you'll find in these scones:

Coconut Oil
Ground Flaxseed
Craisins
Agave Nectar
Gluten-Free Flour


Coconut Cranberry Scones
(Serves 6-8)

Ingredients:
  • 2 cups gluten-free flour (I used Bob's Red Mill All-Purpose Baking Flour)
  • 1 Tablespoon baking powder
  • 1/2 teaspoon salt
  • 5 tablespoons coconut oil
  • 1/4 cup light coconut milk (from a can or carton)
  • 3-4 tablespoons agave nectar
  • 1 flax egg (1 tablespoon ground flaxseed + 3 tablespoons water)
  • 1/3 cup dried cranberries
  • Optional: 1 tablespoon coarse sugar
Directions:
  1. Preheat your oven to 350 degrees and spray a baking sheet with cooking spray and set aside.
  2. In a bowl prepare your flax egg by whisking 1 tablespoons of ground flaxseed with 3 tablespoons of water. Set aside to thicken.
  3. In a large bowl whisk together the flour, baking powder and salt.
  4. Using two knives or a pastry cutter, cut in the coconut oil until there are no clumps larger than pea size. 
  5. Add the coconut milk and agave nectar to your flax egg and stir to combine. Pour the wet ingredients into the dry ingredients and mix until just incorporated.
  6. Fold in the craisins.
  7. Place the dough in the middle of your baking sheet and use your hand to flatten it into a circle about 1 1/2 inches high. Cut the dough into 6-8 equal wedges, but keep the dough together in a circle.
  8. If using the coarse sugar, sprinkle 1 tablespoon on top of the wedges and gently press it into the dough so they don't rub off.
  9. Bake for 17-20 minutes until the scones are cooked through and the bottom is golden.
  10. Eat warm or store in an airtight container for a few days.


Friday, April 11, 2014

Indonesian Peanut Sauce and a Noodle Recipe!

Let me just start by saying that these pictures don't do this dish justice. This peanut sauce is rich, creamy, easy to make and oh, so versatile. I actually hated cooking as a child, but I do remember that this is one of the first recipes I wanted to learn how to make. Growing up, my Mom always made it using chicken as the main ingredient, but you can use it in so many ways. This peanut sauce thickens the longer you let it heat over a hot stove, which causes it to stick to every nook and cranny of whatever you pour it over. Delicious, peanut-y goodness in every bite.

I had forgotten about this sauce for a long time and randomly remembered it after botching a different peanut sauce recipe. I could tell as I tried out the new recipe that it wouldn't be nearly as good as the Indonesian Peanut Sauce I grew up eating. It never thickened and therefore wouldn't be able to coat the noodles very well. Thankfully, I soon after remembered this Indonesian Peanut Sauce and found  the recipe saved on a document I had on my computer. Score! Brett noticed such a big difference between the first recipe that I botched and this recipe I'm going to share with you now. I really hope you try it out! I bet you have all of the ingredients already in your fridge.


Indonesian Peanut Sauce
(Serves 4)

Ingredients:

For the Peanut Sauce
  • 2 tablespoons peanut butter
  • 2 tablespoons reduced sodium soy sauce
  • 1 1/2 tablespoons agave nectar (or brown sugar)
  • 1 tablespoon chopped onion
  • 1 tablespoon lemon juice
  • 3/4 cup low sodium vegetable broth
  • 1 clove garlic, minced
  • 1/4 teaspoon crushed red pepper flakes (or to taste)
For the Noodle Dish:
  • 4 servings of cooked, whole wheat linguini or any kind of noodle you desire
  • Chopped veggies of choice (I like zucchini, bell peppers and broccoli)
  • Protein of choice (tofu, tempeh, etc.) cut into bite size pieces
Directions
  1. Combine all of the ingredients for the peanut sauce in a bowl and whisk until fairly smooth.
  2. Pour the sauce into a skillet over medium heat and whisk often to keep the sauce from sticking or clumping. Let the sauce cook for about 5-10 minutes until it has thickened.
  3. For the Noodle dish, saute your chopped veggies and protein in a separate skillet while the peanut sauce thickens.
  4. Once the sauce is almost done cooking, add in your veggies, protein and pasta to the peanut sauce. Toss all the ingredients together so that the noodles, veggies and protein can get fully coated with the sauce.
  5. Add more red pepper flakes if desired and serve warm!
 

Eat Consciously,

Faith

Saturday, March 29, 2014

Lemon Poppy Seed and Yogurt Pancakes


I love Saturday morning pancakes...especially for lunch on Friday because you're working from home and are still wearing your PJs. Yesterday Brett and I did just that. We worked from home and didn't get dressed until 5 PM when we had to leaving to go watch Frozen. Rough life right? My office was doing an outdoor showing of Frozen and they give away free hotdogs, pop corn, chips and slushies. It's always fun to watch a clean movie outside on a nice, Florida evening with friends.

But back to food.

I never get sick of breakfast food, but I rarely spend more than a few minutes zapping some oatmeal in the microwave or pouring almond milk over a bowl of cereal. Yesterday though I was craving some lemon poppy seed pancakes and thankfully that sounded good to Brett too. 


Lemon poppy seed is one of my all-time favorite flavor combinations. If I had to choose one kind of muffin to eat for the rest of my life, lemon poppy seed would win. Hands down. And we all know there are some amazing muffins out there. 

It just light and sweet but not too heavy. I whipped these up with half whole wheat flour and half all-purpose flour and I used almond milk and my homemade non-dairy yogurt as the main wet ingredients. Add in some lemon juice, zest and some poppy seeds and then you're good to go!


Look how light and fluffy those lil' guys look!


And you can never go wrong with some earth balance and agave on top. Perfection.


This was a new recipe and I'm happy to say that it is Brett approved. I was pretty pleased with the results myself. It's so fun to make something common like pancakes a little more special, especially on a Friday afternoon.


Lemon Poppy Seed and Yogurt Pancakes
(Serves 3-4)

Ingredients:
  • Scant 1/2 cup almond milk
  • 3 tablespoons fresh lemon juice
  • 1/2 cup non-dairy, plain yogurt
  • 1 flax egg (1 tablespoon ground flaxseed + 3 tablespoons water)
  • 2 tablespoons applesauce
  • 1/2 whole wheat flour
  • 1/2 all-purpose flour
  • 2 tablespoons natural cane sugar
  • 1 teaspoon baking powder
  • 1/2 teaspoon baking soda
  • 1/2 teaspoon salt
  • 1 1/2 teaspoons poppy seeds
  • 1 teaspoon lemon zest (about 1 lemon's worth)
Directions
  1. In a small bowl, stir the lemon juice and milk together and set it aside for a few minutes to curdle.
  2. Prepare your flax egg by whisking 1 tablespoon ground flaxseed and 3 tablespoons of water together. Set aside. 
  3. In a medium sized bowl mix together the dry ingredients: flours, sugar, baking powder, baking soda, salt, poppy seeds and zest.
  4. Add in the yogurt, flax egg and applesauce to your milk and lemon mixture and stir until combined.
  5. Pour the wet ingredients into the dry ingredients and mix until mostly lump free.
  6. Using a skillet and some cooking spray, cook about 1/4 cups of batter at a time, flipping each pancake when the edges begin to bubble and the bottom is golden brown.
  7. Serve warm with earth balance spread and your choice of syrup!


Eat Consciously,

         Faith

Saturday, March 22, 2014

Almond Pulp Freezer Fudge


I love Saturdays. Period.

Brett and I left the house this morning at 8:30 for a morning of fun errands. First, he went to a boxing class while I hit up Whole Foods. I got rolled oats, nutritional yeast and wheat bran from the bulk section and two cartons of almond milk (to try and make homemade yogurt with...I'll keep you posted) and only spent 8 bucks! That's a win.

After Brett got out of class we sold some of our books at a book store. We only made $25 for a lot of books, but it felt good to get them out of the house and to make some money. We are slowly trying to get ride of things we don't need and sell some of our bulky furniture in preparation for moving to NYC. Slowly being the key word. We're getting there though!

Next was the Farmer's Market in Winter Park...or at least so we thought. Traffic was crazy the closer we got to the market. Luckily we found parking not to far away. Once we made it to Park Ave, the main street in Winter Park, we realize why there was so much traffic. There was an art show! Hundreds of people were there perusing the art, eating popcorn and hot dogs and just enjoying the beautiful, Florida weather. The Farmer's Market wasn't happening, but all the art we got to see made up for it. I'm amazed by people's artistic abilities. Incredible. 

We walked around for a while until Brett wanted some food. He got a Burger at BurgerFi, a new-ish restaurant in Winter Park and then we headed home. 


I guess I'll stop boring you with Brett and my Saturday shenanigans and get to the good stuff. Fudge! The last recipe I posted was for Homemade Almond Milk and I mentioned that there are different ways you can use the almond pulp that is left over after you make your milk. No reason to waste all that nutritious goodness!

This fudge is easy and healthy and I just keep it in the freezer for a quick sweet tooth fix. Enjoy!


Almond Pulp Freezer Fudge
(Makes 30 squares)


 Ingredients:

· 1/2 cup old-fashioned oatmeal
· 1/2 cup raw almond pulp
· 3 tablespoons cocoa powder
· 2 tablespoons agave nectar
· 1/4 cup almond milk
· 2 tablespoons coconut oil
· 2 tablespoons applesauce
· 1/2 teaspoon sea salt
  
Directions:

1. Line an 8 x 8 baking dish with wax paper and set aside.
2. Using a food processor, start by processing the 1/2 cup of rolled oats into oat flour.
3. Add in remaining ingredients and puree until smooth. You may need to stop and push down the sides with a spatula occasionally.
4. Once smooth, pour into your prepared baking dish.
5. Freeze for 2-3 hours. Then remove the fudge from the dish and cut into pieces. I cut mine into 30 pieces, but you can make them whatever side you want.
6. Store in the freezer and enjoy!

Notes: Adapted from here.


Eat Consciously,
     Faith


Tuesday, March 18, 2014

Whole Wheat Sandwich Bread (Vegan and No-Knead!)

It's official.

I've decided I'm going to make everything at home that I can.


Bread. Tortillas. Beans. Peanut butter. Almond milk. Non-dairy cheese and yogurt even.

I always hate when I go to buy some bread or tortillas and have a hard time finding a loaf that doesn't have 20+ ingredients. Or that I have to be careful to thoroughly rinse my beans to rid them of their metal taste and excess salt. Or that, unless I live by Trader Joe's, it's hard to find natural peanut butter that only contains peanuts and doesn't cost a fortune. You'd think less ingredients would equal less expensive.

I've always wanted to do this, but always thought it would be really time consuming. Lately, however, I've been realizing that once Brett and I move overseas we won't necessarily have access to certain things like non-dairy milk, whole wheat bread or non-exported peanut butter.

I might as well start learning and practicing now!

The crazy thing is that since Brett and I got home from Texas on Sunday night I've already made a loaf of whole wheat bread, 6 whole wheat tortillas for wraps, a big pot 'o black beans and vegan cheese. And it was easy!

Sure the bread required a few hours of rising time and the black beans had to soak over night, but I was able to go on with normal life during those waiting periods.

And the best thing is: I know exactly what was put in my loaf of bread. Five ingredients.

And the tortillas? Four ingredients.

Love it.

I know you're probably thinking, "Faith, homemade bread and tortillas are easy to make. Everyone does that!"

I know. But it's a big step for me and soon I'll have some staple, go-to recipes for all of these basics. It's the vegan cheese and yogurt that will be the challenging foods, but I'm ready to learn!

Okay, now onto the bread. This recipe I found at the Vegan Baker. It only requires five ingredients, one of which is water, and you don't have to knead it. The total time it takes to make is about five hours, but much of that time is spent letting the dough rest in a warm place to rise. Seriously, this bread is so easy and Brett and I love it!

Ingredients: 
2 cups warm water
2 tablespoons agave nectar
1 1/2 teaspoons active dry yeast
3 1/2 cups whole wheat flour
1 1/4 teaspoons salt


To make this bread you start by whisking together the warm water, agave and yeast. Then you let it sit for 10 minutes until the yeast starts to activate and the mixture becomes foamy.


In a separate bowl you whisk together the whole wheat flour and the salt. Then you pour in the wet ingredients and mix vigorously for one minute with a wooden spoon until a sticky dough forms.
Place a plastic bag over the bowl (or pot!) and let it sit in a warm place for about 
1.5 hours until it doubles in size.

After 1.5 hours, use your wooden spoon to mix it again for about 30 seconds. Recover the bowl and let it rise again for another 1.5 hours or until double in size. 


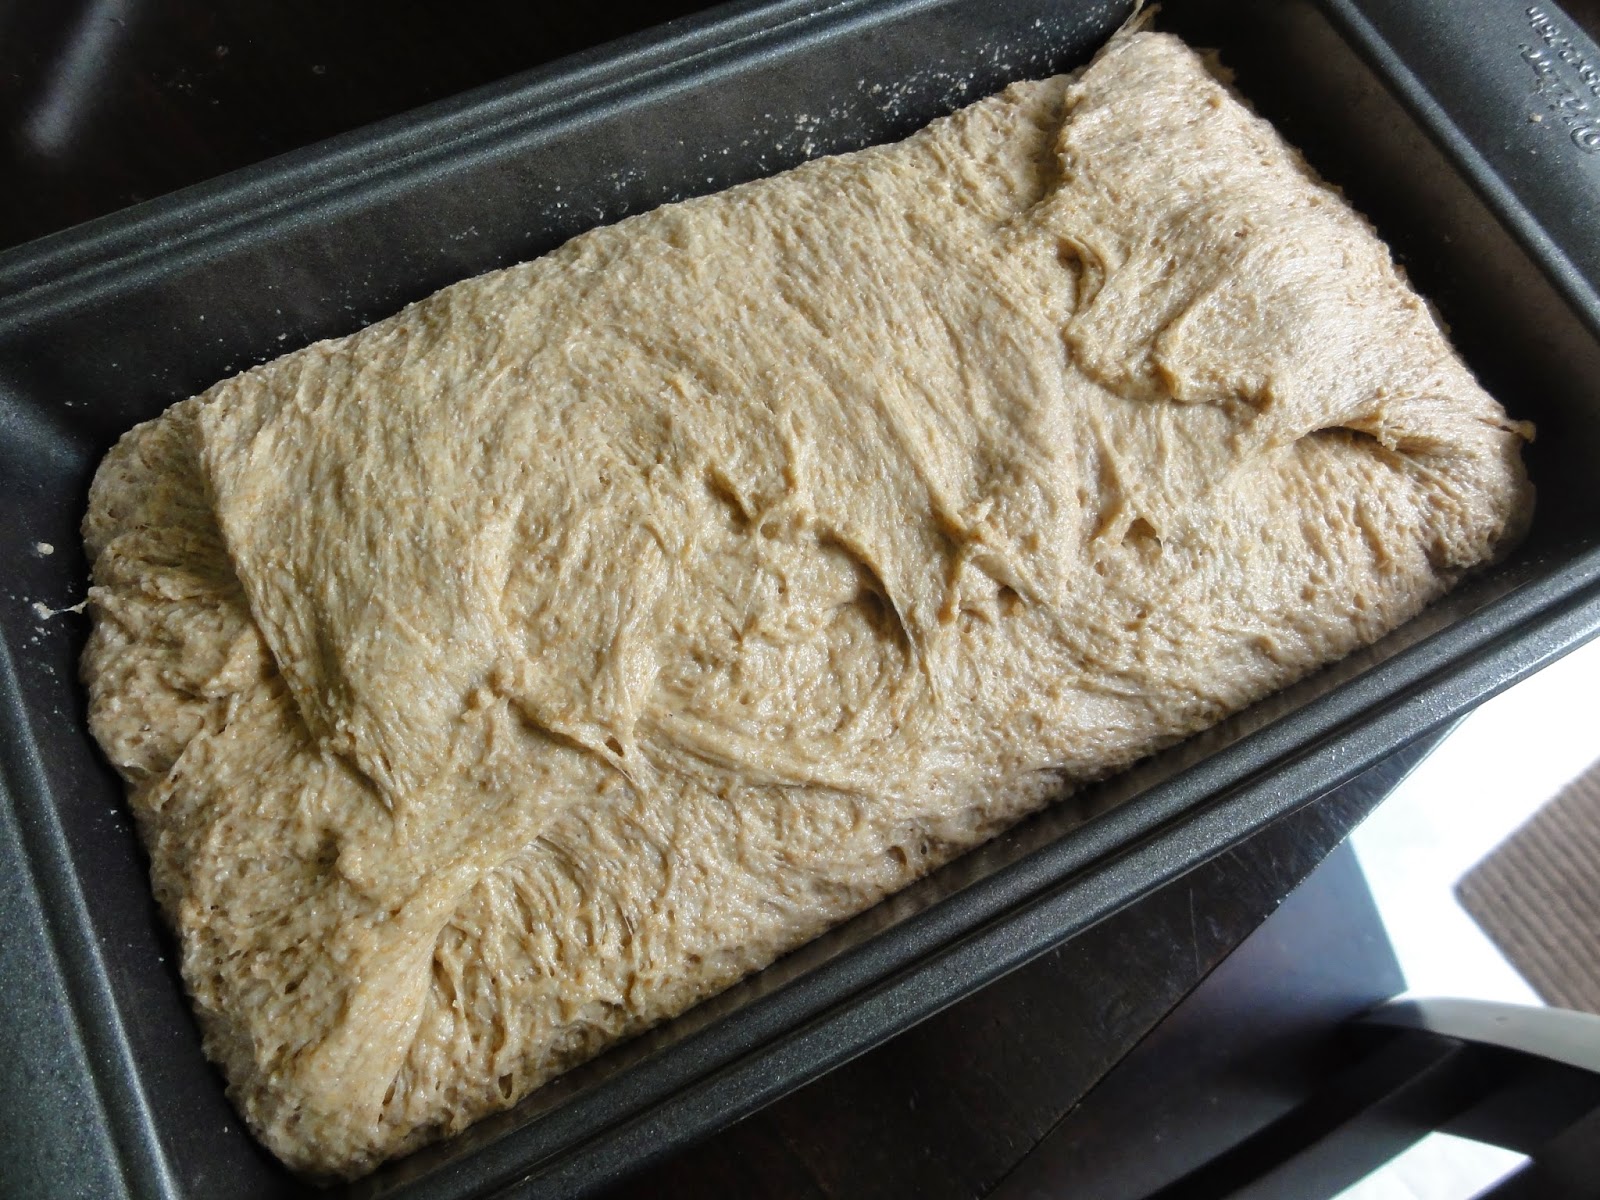
For one last time, mix the dough for about 30 seconds to de-gas it. Then place the dough in a loaf pan that has been sprayed with cooking spray. Spread the dough out so that it fills the whole pan.


Let the dough rise again for about 40 minutes until it is about 80-90% of the size it will be when baked.


If the dough gets a little out of control, use your hands to stretch the dough from the perimeters across to the other side of the pan. Do this all the way around.


Then bake the bread at 350 degrees for 40-45 minutes, rotating the pan 180 degrees half way through.


Let the loaf cool in the pan for about 30 minutes before transferring it to a wire rack to finish cooling.

 
Slice and enjoy!


If you know you're going to go through the entire loaf in about a week, it should keep stored in a air tight bag in a cool place. Otherwise slice the entire loaf and store it in the freezer!