Showing posts with label Bread. Show all posts

Sunday, May 4, 2014

One Simple Bread Recipe. Multiple Possibilities!


Ah this bread. It's so delicious, simple and versatile. 

You can make it with white or wheat flour. You can add in herbs to the dough. You can make a couple Italian loaves. You can make individual flat breads. You can roll the dough flat, spread marinara sauce and cheese over it and then roll it up to make pizza bread. Endless possibilities I tell ya!

Basically this recipe is must have and use often kind of recipe.


Simple Bread Recipe 
I didn't know what else to call it!
(Makes 2 loaves or 8 flatbreads)

Ingredients:
  • 4 cups flour
  • 4 1/2 teaspoons yeast
  • 1 teaspoon to 1 tablespoon salt*
  • 1 teaspoon to 1 tablespoon sugar*
  • Approximately 3 cups warm water (105-115 degrees)
*Use whatever amount of salt and sugar between 1 teaspoon and 1 tablespoon that you desire. Just make sure the amount of salt and sugar are equal. For example, I usually use 1 1/2 teaspoon salt and sugar.

Directions:
  1. Combine the dry ingredients in a food processor or mixer with the dough hook attachment.
  2. Turn on the appliance and gradually add enough water in a fine stream to make a ball of dough. Make sure to add the water slowly, because you don't want to put too much water in so the dough gets too wet and sticky. Once the dough forms, stop pouring the water, but let the machine continue to run for a minute or so to knead the dough.
  3. Place the dough in a greased bowl or plastic container, cover it loosely with a towel and let it rest for 20 minutes.
  4. For Italian Loaves: After the dough has rested 20 minutes, divide it into two sections. Roll each section into a rectangle and then starting at the long end, roll up the dough into a loaf. Seal the long edge together and pinch together the ends. Place the loaves on greased cookie sheets and cover with plastic wrap and a towel. Let them rest for 1 hour. Bake the loaves at 425 degrees for 10 minutes. Turn the loaves and bake 10 minutes more or until golden brown.
  5. For Pizza Bread: Follow the directions for the italian loaves, but spread pizza sauce, cheese and toppings on the rectangles of dough before you up the dough into loaves. Make sure you leave a couple inches of space around the edges so the sauce doesn't ooze out when you roll up the dough. Let the dough rise for one hour under plastic wrap and a towel and bake for 20 minutes at 425 degrees, rotating halfway through.
  6. For Flatbread: After the dough has rested 20 minutes, divide the dough into 8 equal section and roll the sections into balls. On a lightly floured surface, use a rolling pin to roll out each section to about 1/4 inch thick. Using a greased grill or skillet, cook each piece of flatbread separately for a few minutes on each side. 


Place all of the dry ingredients into a food processor or mixer fitted with the dough attachment.
Pulse a few times to make sure everything is well mixed.

While the machine is running, slowly pour in the warm water in a steady stream.

Pour just enough water until a ball of dough forms.
Once the dough forms stop pouring water into the mixer, but let 
the machine run for a minute to knead the dough.

Place the dough in a greased bowl and cover with a towel. Let it rest for 20 minutes.

The dough will rise while it's resting.

Divide the dough into sections. The number will depend on whether you making loaves or flatbread.

The remaining pictures show the process for making flatbread:


Eat Consciously,

Faith

Saturday, April 5, 2014

How To Make Traditional Indian Flatbread: Chapati!


The first time I had Chapati, also known as Roti (which means bread), was two years ago during a 6-week work trip to India. It was served at almost every meal and it quickly became the food I looked forward to most at meal times. At times my coworkers and I were served some suspicious foods, but Chapati was the one thing I could count on to be familiar and delicious.

After getting back from India, I missed eating Chapati so much that I quickly found an Indian market close by and bought some from their freezer section. It was good, but not as good as the fresh, warm Chapati that was served to us in India. Yet, I just kept buying it from the store and never once thought about learning how to make it myself.


Fast forward a few months. 

One of Brett and my friends and neighbor ended up getting a roommate named Abby who grew up in Kenya. Abby's energetic and friendly personality made it easy for us all to become good friends quickly. One night a group of us got together to hangout and Abby cooked us all some traditional Kenyan food. It just so happened that one of the side dishes she made was Chapati! At the time I didn't know that versions of Chapati are also found in Kenya, Tanzania and Uganda, so I was surprised and so excited to see that she knew how to make it. 

Oh. My. Goodness. It was delicious. In fact, it was so good that we asked to take some of the leftovers home with us for lunch the next day. Of course, I also asked if she could teach me how to make it and a few weeks later she did! 

So now, thanks to Abby, I can share the recipe and process for making authentic Chapati with you! In fact,  I just made Chapati using this recipe for some of my friends from Bangladesh last night and they all said it was just like the real deal and tasted great.

However, I will warn you that in order to make authentic Chapati you can't have a phobia of oil. You'll be brushing oil on these bad boys a number of different times...and it's gonna be delicious! Of course, if you want to lighten up this recipe you can skip steps 4-7 and use more cooking spray, but just know that they won't turn out as soft and pliable. 

Oh, and on a side note, when Brett traveled to India, most people called him Roti because when he introduced himself as "Brett" people thought he said "Bread". Get it? Brett. Bread. Roti...


Chapati
(Serves 8)

Ingredients:
  • 2 cups flour (all-purpose, whole wheat or a mix)
  • Pinch of salt
  • 1 cup warm water
  • Oil (non-flavored oil is best)
Directions:

(To see the directions without pictures go to the bottom of this post.)

1. Make the dough. In a large bowl, whisk together the flour and salt. Pour in the water and stir until dough forms.


2. Infuse with oil. Poke holes in the dough and pour a little oil in the holes. Cover the dough with a towel and let it rest in a warm spot for 30 minutes to 2 hours.


3. Knead and divid: After the dough has sat for an hour or so, knead it for a minute or two in the bowl to incorporate the oil into the dough. Then divide the dough into 8 equal sections.

4. Roll out the dough. Take a section of dough and roll it out on a lightly floured surface. You will probably have to flip it over a few times. Make sure it doesn't get stuck to your rolling surface.


5. Coat with Oil and Roll. After you've rolled the dough into a thin, large circle, cut a slit in the dough from the center to the edge.


Using a pastry brush, brush a little oil all over the surface of the dough.


Then using your hands, start from one edge of the slit and roll the dough up into a cone.


Take the last corner of the dough and push it into the center of the cone to seal the dough.


6. Repeat for all sections. Repeat steps 4 and 5 for the remaining sections of dough until you have 8 little "flowers". 


7. Rest 30 minutes.  Place the "flowers" on parchment paper and try not to let them touch or they may stick together. Cover the dough with a towel and let them rest for another 30 minutes.


8. Prepare to cook the Chapati. Start by preparing your cooking station. Preheat a large skillet to medium heat. Have a small bowl of oil and a pastry brush nearby as well as cooking spray and a plate with aluminum foil and a towel.


Roll out the dough one section at a time on a lightly floured surface. Again, be sure to flip the dough over as you roll it out so that it doesn't stick to your rolling surface. Add more flour if necessary. Roll the dough as thinly as possible.


9. Cook the Chapati. Spray your heated skillet with cooking spray. Place the rolled out dough onto the skillet and turn it a little with your hand so that it doesn't stick. Quickly brush the top surface of the dough with oil.


After you've brushed the top surface, flip the dough over and brush the top surface of the dough again with oil. Soon bubbles will begin to form in the dough. Let the dough cook for about 30 seconds while you use a fork to move it around and keep it from sticking.


After about 30 seconds, or once you see some brown spots on the underneath part, flip the chapati over and let the other side cook for a while until brown spots form.


10. Remove, stack and cover. After you have cooked both sides, carefully take the chapati off the pan (I use a fork) and place it on your prepared plate with aluminum foil.


Fold more aluminum foil over top of the Chapati and cover it with a dish towel. This keeps the Chapati warm and allows the oil to continue moistening the Chapati.


11. Repeat. Repeat steps 9 and 10 until all the sections have been rolled out, cooked and are stacked on top of each other and covered with the aluminum foil and a dish towel. 

12. Enjoy! Serve the Chapati warm or let them cool and store them in a zip-lock bag in the fridge for 4-5 days. To reheat you can wrap them tightly in aluminum foil and place them in an oven preheated to 200 degrees until warm.


Directions:
  1. Make the dough. In a large bowl, whisk together the flour and salt. Pour in the water and stir until dough forms.
  2. Infuse with oil. Poke holes in the dough and pour a little oil in the holes. Cover the dough with a towel and let it rest in a warm spot for 30 minutes to 2 hours.
  3. Knead and divid: After the dough has sat for an hour or so, knead it for a minute or two in the bowl to incorporate the oil into the dough. Then divide the dough into 8 equal sections.
  4. Roll out the dough. Take a section of dough and roll it out on a lightly floured surface. You will probably have to flip it over a few times. Make sure it doesn't get stuck to your rolling surface.
  5. Coat with Oil and Roll. After you've rolled the dough into a thin, large circle, cut a slit in the dough from the center to the edge. Using a pastry brush, brush a little oil all over the surface of the dough. Then using your hands, start from one edge of the slit and roll the dough up into a cone. Take the last corner of the dough and push it into the center of the cone to seal the dough.
  6. Repeat for all sections. Repeat steps 4 and 5 for the remaining sections of dough until you have 8 little "flowers". 
  7. Rest 30 minutes.  Place the "flowers" on parchment paper and try not to let them touch or they may stick together. Cover the dough with a towel and let them rest for another 30 minutes.
  8. Prepare to cook the Chapati. Start by preparing your cooking station. Preheat a large skillet to medium heat. Have a small bowl of oil and a pastry brush nearby as well as cooking spray and a plate with aluminum foil and a towel. Roll out the dough one section at a time on a lightly floured surface. Again, be sure to flip the dough over as you roll it out so that it doesn't stick to your rolling surface. Add more flour if necessary. Roll the dough as thinly as possible.
  9. Cook the Chapati. Spray your heated skillet with cooking spray. Place the rolled out dough onto the skillet and turn it a little with your hand so that it doesn't stick. Quickly brush the top surface of the dough with oil. After you've brushed the top surface, flip the dough over and brush the top surface of the dough again with oil. Soon bubbles will begin to form in the dough. Let the dough cook for about 30 seconds while you use a fork to move it around and keep it from sticking. After about 30 seconds, or once you see some brown spots on the underneath part, flip the chapati over and let the other side cook for a while until brown spots form.
  10. Remove, stack and cover. After you have cooked both sides, carefully take the chapati off the pan (I use a fork) and place it on your prepared plate with aluminum foil. Fold more aluminum foil over top of the Chapati and cover it with a dish towel. This keeps the Chapati warm and allows the oil to continue moistening the Chapati.
  11. Repeat. Repeat steps 9 and 10 until all the sections have been rolled out, cooked and are stacked on top of each other and covered with the aluminum foil and a dish towel. 
  12. Enjoy! Serve the Chapati warm or let them cool and store them in a zip-lock bag in the fridge for 4-5 days. To reheat you can wrap them tightly in aluminum foil and place them in an oven preheated to 200 degrees until warm.

Notes: If you want to decrease the oil in this recipe, skip steps 4-6 and use mostly cooking spray to cook the chapati. Remember that you probably won't get the same results.

Eat Consciously,

Faith

Tuesday, March 18, 2014

Whole Wheat Sandwich Bread (Vegan and No-Knead!)

It's official.

I've decided I'm going to make everything at home that I can.


Bread. Tortillas. Beans. Peanut butter. Almond milk. Non-dairy cheese and yogurt even.

I always hate when I go to buy some bread or tortillas and have a hard time finding a loaf that doesn't have 20+ ingredients. Or that I have to be careful to thoroughly rinse my beans to rid them of their metal taste and excess salt. Or that, unless I live by Trader Joe's, it's hard to find natural peanut butter that only contains peanuts and doesn't cost a fortune. You'd think less ingredients would equal less expensive.

I've always wanted to do this, but always thought it would be really time consuming. Lately, however, I've been realizing that once Brett and I move overseas we won't necessarily have access to certain things like non-dairy milk, whole wheat bread or non-exported peanut butter.

I might as well start learning and practicing now!

The crazy thing is that since Brett and I got home from Texas on Sunday night I've already made a loaf of whole wheat bread, 6 whole wheat tortillas for wraps, a big pot 'o black beans and vegan cheese. And it was easy!

Sure the bread required a few hours of rising time and the black beans had to soak over night, but I was able to go on with normal life during those waiting periods.

And the best thing is: I know exactly what was put in my loaf of bread. Five ingredients.

And the tortillas? Four ingredients.

Love it.

I know you're probably thinking, "Faith, homemade bread and tortillas are easy to make. Everyone does that!"

I know. But it's a big step for me and soon I'll have some staple, go-to recipes for all of these basics. It's the vegan cheese and yogurt that will be the challenging foods, but I'm ready to learn!

Okay, now onto the bread. This recipe I found at the Vegan Baker. It only requires five ingredients, one of which is water, and you don't have to knead it. The total time it takes to make is about five hours, but much of that time is spent letting the dough rest in a warm place to rise. Seriously, this bread is so easy and Brett and I love it!

Ingredients: 
2 cups warm water
2 tablespoons agave nectar
1 1/2 teaspoons active dry yeast
3 1/2 cups whole wheat flour
1 1/4 teaspoons salt


To make this bread you start by whisking together the warm water, agave and yeast. Then you let it sit for 10 minutes until the yeast starts to activate and the mixture becomes foamy.


In a separate bowl you whisk together the whole wheat flour and the salt. Then you pour in the wet ingredients and mix vigorously for one minute with a wooden spoon until a sticky dough forms.
Place a plastic bag over the bowl (or pot!) and let it sit in a warm place for about 
1.5 hours until it doubles in size.

After 1.5 hours, use your wooden spoon to mix it again for about 30 seconds. Recover the bowl and let it rise again for another 1.5 hours or until double in size. 


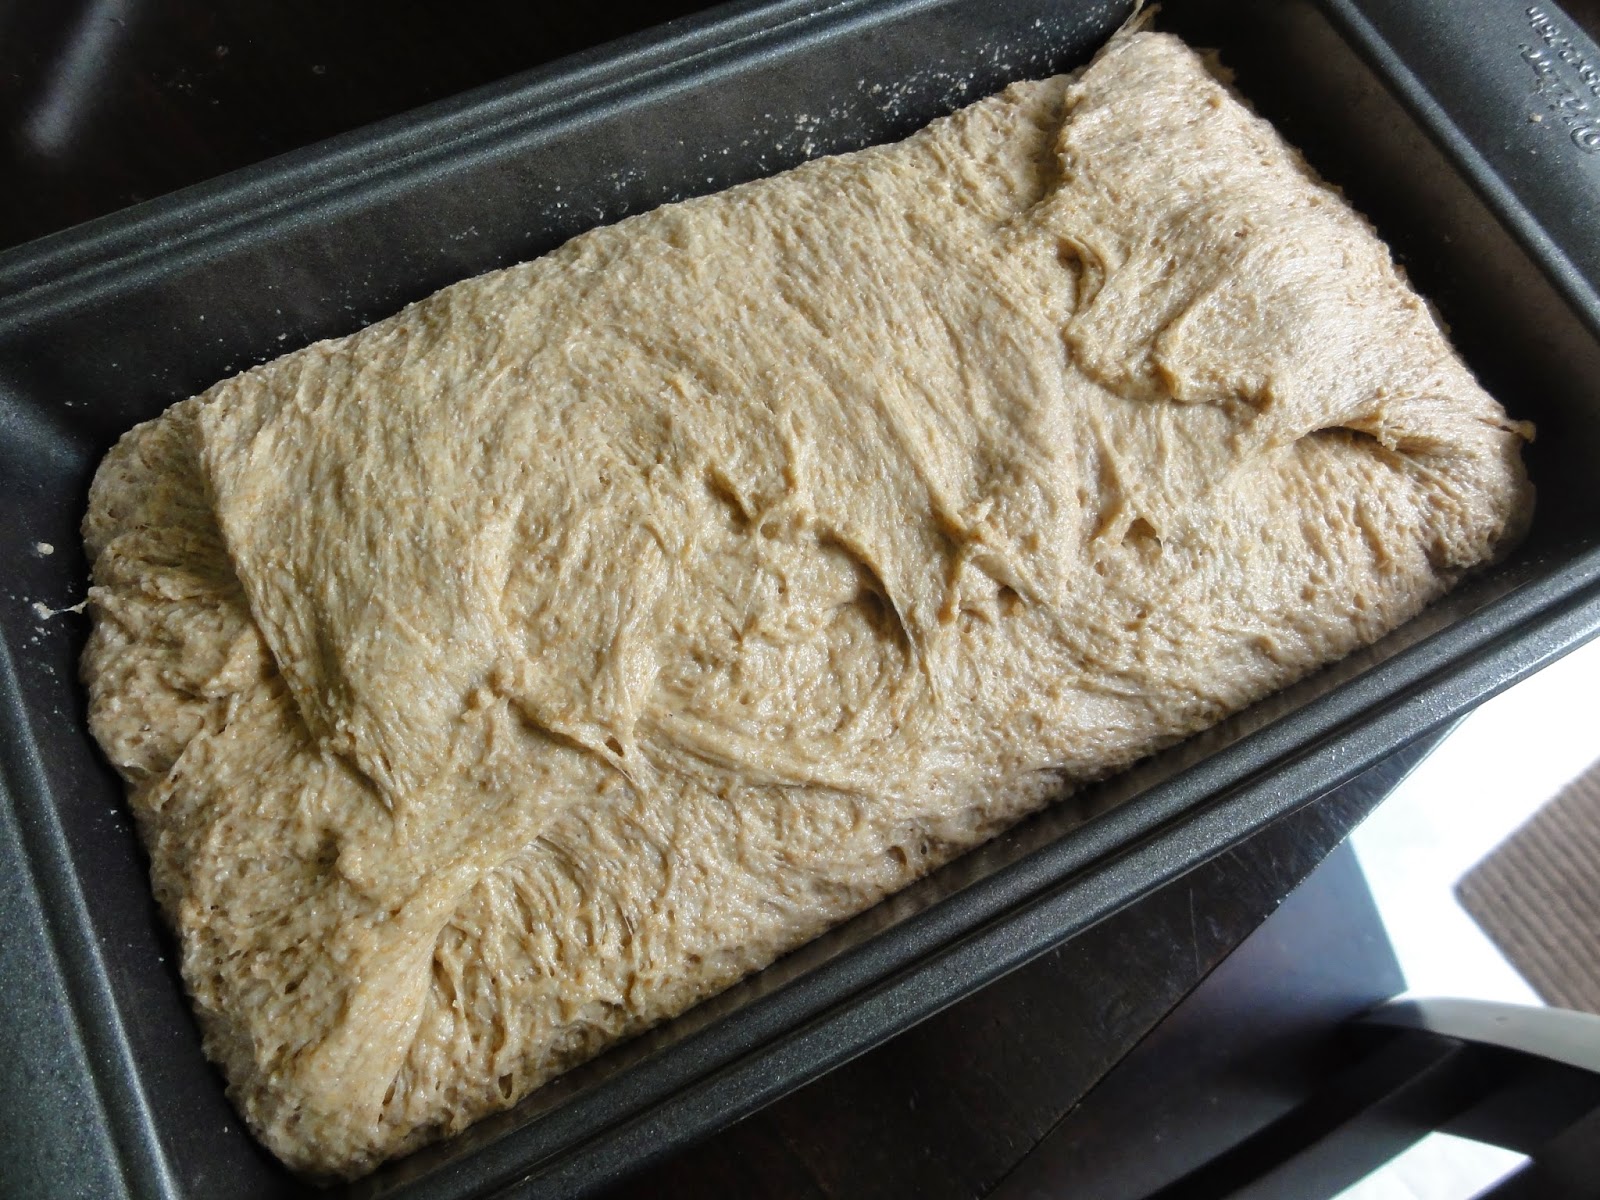
For one last time, mix the dough for about 30 seconds to de-gas it. Then place the dough in a loaf pan that has been sprayed with cooking spray. Spread the dough out so that it fills the whole pan.


Let the dough rise again for about 40 minutes until it is about 80-90% of the size it will be when baked.


If the dough gets a little out of control, use your hands to stretch the dough from the perimeters across to the other side of the pan. Do this all the way around.


Then bake the bread at 350 degrees for 40-45 minutes, rotating the pan 180 degrees half way through.


Let the loaf cool in the pan for about 30 minutes before transferring it to a wire rack to finish cooling.

 
Slice and enjoy!


If you know you're going to go through the entire loaf in about a week, it should keep stored in a air tight bag in a cool place. Otherwise slice the entire loaf and store it in the freezer!


Sunday, March 2, 2014

Whole Wheat Oatmeal Chocolate Chip Banana Bread (No Refined Sugars!)

Saturday mornings. You gotta love 'um. Especially when you've been traveling a bunch and haven't had a day off in a while. Brett and I got home Friday night from Arkansas and went to bed excited for a weekend without work. 


When we're in town, we love the Saturdays mornings when we get to spend time with our friends Mary and Justin and their two kids. What started as Brett and Justin working out every once in a while has turned into Saturday morning workouts with sometimes all four of us in their garage lifting weights, jumping rope and getting our sweat on. Since I often do cardio to workout, these high-intensity interval workouts are always a welcomed change of scenery...not to mention they kick my butt. Also if you're injured like I am and can't run, interval workouts are another great way to get out some endorphins while you (patiently) wait for your body to heal. At the bottom of this post you can find the 30 minute interval workout we did (or check out the new workout tab for other workouts I've posted before!)


Yesterday Mary and Justin were free so we planned for a late morning workout with lunch afterwards. Since I had the morning off I figured I make some banana bread to take over. I've been wanting to try out an oatmeal banana bread recipe, with minimal sugar, for a while and I'm happy with how this loaf turned out! It's subtly sweet, but if you add the chocolate chips you won't miss a thing!


Whole Wheat Oatmeal Chocolate Chip Banana Bread
(Makes 12 servings)


 Ingredients:

· 1 1/2 cups mashed banana (about 3-4 ripe bananas)
· 1/4 cup agave nectar (or liquid sweetener of choice)
· 1/3 cup unsweetened applesauce
· 1 teaspoon vanilla extract
· 3/4 cup unsweetened almond milk
· 1 flax egg (1 T ground flaxseed + 3 T water)
· 1 1/2 cups whole wheat flour
· 1 cup old-fashioned oatmeal
· 1 1/2 teaspoons baking powder
· 3/4 teaspoon baking soda
· 1/4 teaspoon salt
· 1 teaspoon ground cinnamon
· 1/4 teaspoon nutmeg
· 1/4—1/2 cup chocolate chips

Directions:

1. Preheat your oven to 350 degrees and spray a 9-inch loaf pan with cooking spray.
2. In a small bowl mix make your flax egg by whisking 1 tablespoon of ground flaxseed and 3 tablespoons of water together. Set aside for 5 minutes
3. In a medium sized bowl combine the wet ingredients, from the  mashed banana to the almond milk.  Then add in your flax egg and stir until well mixed.
4. In a large bowl, whisk together the dry ingredients, from the whole wheat flour to the nutmeg.
5. Pour the wet ingredients into the dry ingredients and stir until just combined.
6. Lastly, mix in the chocolate chips.
7. Pour the batter into your prepared loaf pan and bake for 60 minutes or until a toothpick comes out clean.
8. Let the loaf cool and then slice and enjoy!


This bread was delicious right out of the oven (of course I had to try some before I served it to people. Each slice has almost 5 grams of fiber and almost 4 grams of protein! If you like a sweeter bread, up the liquid sweetener to 1/3 cup.


30 Minute "Spartacus" Interval Workout

1 minute for each exercise.
15 second rest between exercises.
1 minute rest between sets.

1. Spider Man Push-Ups
2. Russians
3. Plank Push-ups
4. Side Plank Arm Raises (30 seconds each side)
5. Groucho Walks
6. Mountain Climbers
7. Squats with Press
8. Alternating Bicep Curls
9. Calf Raises with Shrugs
10. Hand Stand (against a wall)

For definitions or pictures of each workout see below!

Spider Man Push-Ups 
Russians:

Start in a table top position with one leg raised. Then quickly alternate kicking one leg up at a time.


Plank Push-Ups:


Side Plank Arm Raises:

Groucho Walk:

Get in a low squat and stay squatted as you take six steps forward and then six steps back. Repeat.

Mountain Climbers:

In a plank position, alternate bringing one knee up to your chest and then back out. Move quickly.

Squats with Press:

Alternating Bicep Curls:

Calf Raises with Shoulder Shrugs:
With weights, raise up onto your tip-toes and while on your toes do two shoulder shrugs. Repeat.

Hand Stand:

Hold a handstand as long as you can while your feet are resting against a wall. 


Eat Consciously,
     Faith